2. At the bottom right of the
calendar, you need to click on Login.

3. You will get the following
screen. 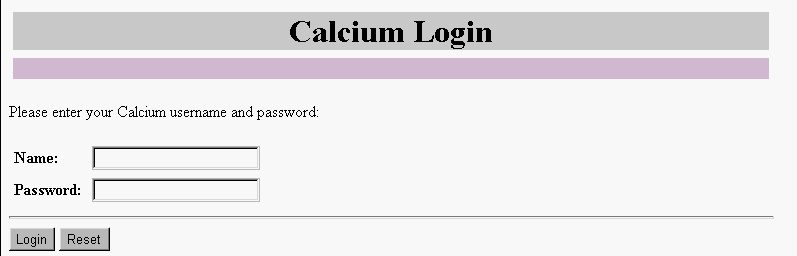
4. Enter your Name and Password
(provided to you in email) and click on Login. Remember, the name
and password are case sensitive.
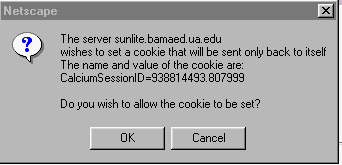
**You MAY get
a screen similar to the screen below if you have your preferences
set to: Warn me before accepting a cookie". You MUST
accept the cookie as it will match your name with your password to let
you add, edit, delete, etc., events to the calendar.**
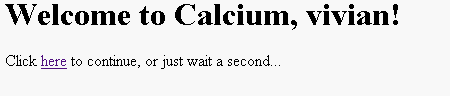
5. Once you click on Login, you will get the following screen before being taken to the calendar.
6. If you want to add an appointment,
click on the underlined date of the day you want to enter your information.
In this example, click on the underlined 6. 
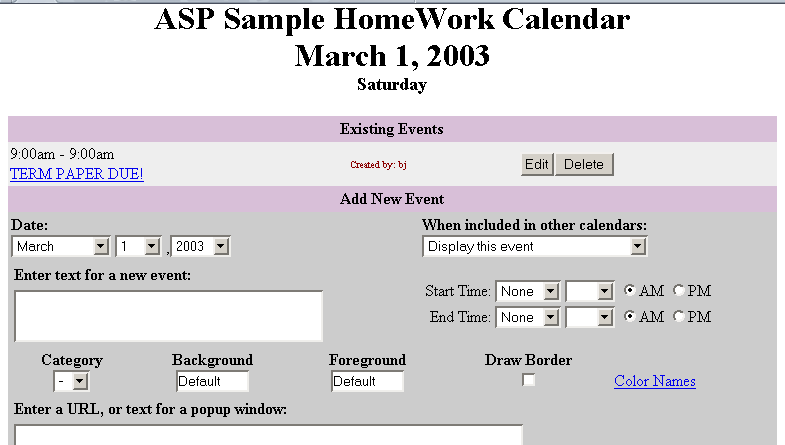
7. The next screen will allow
you to enter your new Event or appointment and the time frame. For this
calendar, each of you select a Background
Color (that looks good with this light yellow calendar) and
this will be "your" color for the entire
grant. This will make it easier for folks to spot when you're going
to be in the schools. Click on Colorto
see what color backgrounds are available.
As you can see,  , the three of us (Marsh, McFadden, & Price) are using aqua
for
our background color. When you see the aqua,
you'll
know that one, two, or all three of us will be out in the school.
, the three of us (Marsh, McFadden, & Price) are using aqua
for
our background color. When you see the aqua,
you'll
know that one, two, or all three of us will be out in the school.
If more than one of you are going out to the schools at the same time, use the background color of the person who enters the information on the calendar.
Click in the box by
Draw Border. ![]() . A border will be drawn around the event which will make it
easier for folks to see the events if there's more than one event on any
given day.
. A border will be drawn around the event which will make it
easier for folks to see the events if there's more than one event on any
given day.
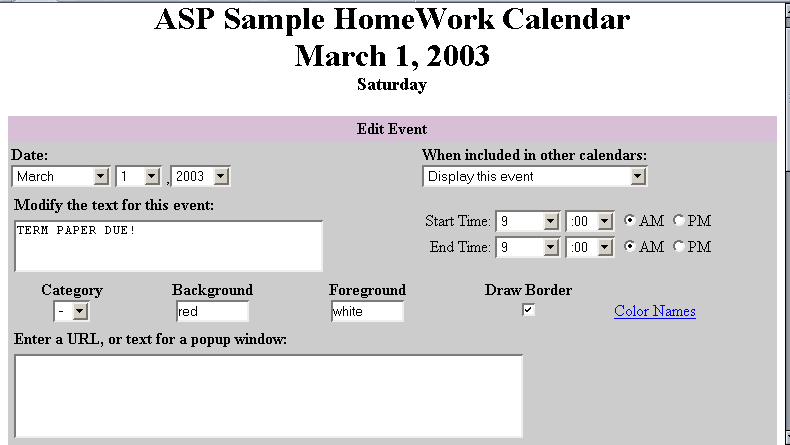
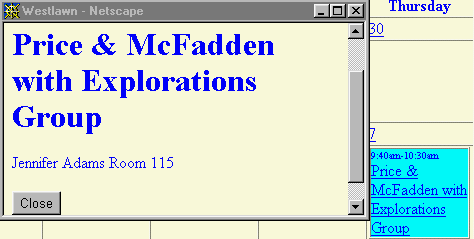
8. Now enter any information you want to show up as a POP-UP when you click on an event. (See POP-UP example below).
9.
Repeat Information: If you have an event that repeats such as every
Tuesday, or the 3rd Wednesday of every month, etc, you can input the information
and the program will automatically enter the information for you without
you having to type it in again. See Below:

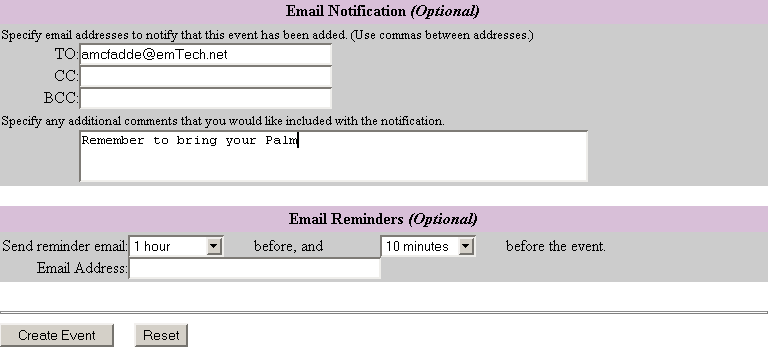
10. EMAIL NOTIFICATION: You can also send out an email to notify individuals that a meeting they should attend has been added to the calendar. You will fill out the TO: CC: and BCC: as you would an any other email program. You can add any comments you would like to the email notification.
EMAIL REMINDER(S): You can also send out an email reminder "before the appointment. You can select how long before the event the email should be sent; example: 30 minutes before and 10 minutes before.
Fill out the information and click on Create Event.
11. If you need to edit an existing event, click on the date and then click on EDIT. Make the necessary changes and then click on Replace Event.
If you need to delete an existing event,
click on Delete.
12. In order to see the entire calendar
again, click on View Calendar. If you want to add another
event,
before viewing the calendar, just click
on a date.

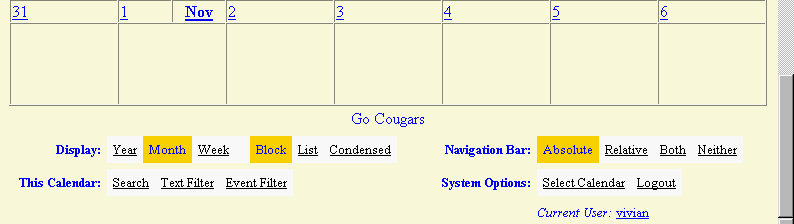
13. Last but not least, yet the most important . . . look at the bottom right of the calendar, PLEASE click on logout. That's it!